Our Beer Yoda Bill took this video of the Wheaton Wheat fermenting. I love the accidental cinematography at the beginning. The slow reveal of the airlock is almost Hitchcock-esque.
I can't wait to see what the resulting beer will taste like.

Monday, January 17, 2011

Sunday, January 16, 2011
Visit to Beer Supply Store
After our adventure in beer brewing apprenticeship yesterday, Matt and I decided to go to the local Sandy Springs beer store to get some supplies. We were going to go after the Bears Vs. Seahawks playoff game but it was so one sided and therefore boring that we headed out before it was over.
Mostly, I just wanted to mention Wine Craft of Atlanta (soon to be called Beer and Wine Craft). The owners were super cool and really walked us through what we needed and gave us a deal on all of our equipment. We got a lot of major items including a glass carboy and a kit to make a brown ale. It is one of my favorite "every day" beers so I figured it would be a good one for a first try.
When we got home we hopped online and bought a 16 quart stainless pot for brewing as well as a chrome shelving unit to store the items in the room we are converting to be our beer headquarters.
As I mentioned earlier we will be in Asheville at a beer festival next weekend and after that it will be time for me to start my own beer brewing experiments.
Mostly, I just wanted to mention Wine Craft of Atlanta (soon to be called Beer and Wine Craft). The owners were super cool and really walked us through what we needed and gave us a deal on all of our equipment. We got a lot of major items including a glass carboy and a kit to make a brown ale. It is one of my favorite "every day" beers so I figured it would be a good one for a first try.
When we got home we hopped online and bought a 16 quart stainless pot for brewing as well as a chrome shelving unit to store the items in the room we are converting to be our beer headquarters.
As I mentioned earlier we will be in Asheville at a beer festival next weekend and after that it will be time for me to start my own beer brewing experiments.
Do or Do Not, There is no Try
Yesterday, Matt and I spent the day with our very own beer Yoda, our friend Bill. Bill has been brewing beer for many years with varied levels of success. So we joined him and his wife Susan for a day of beer making.
We arrived at their house about 11am and then headed out right away to a beer store in Lilburn GA. I had intended to get some supplies myself but because of this past week's winter weather event, they hadn't had any recent deliveries. In fact, they didn't have the precise ingredients for the beer that Bill wanted to brew. So I learned my first lesson in beer brewing - be flexible. He wanted to do a wheat beer he had done before and really focus on that for the next several batches he would make to perfect it. They didn't have the exact wheat beer so he chose another type that seemed like it would be a good fit. It required additional malt which he purchased as well. However, one key ingredient to Bill's "Wheaton Wheat" was an apricot extract so we discussed with the owners (a husband and wife team) about what some alternatives would be and she suggested we go down to an international market just down the street and get some apricot nectar. We were super excited about these ingredients and believe they will make an excellent apricot wheat. We returned to their house and began the process.
The first step we learned was to make sure the work space was clean and sterile. Bill recommended a product called B Bright. We cleaned all the equipment and all the surfaces in the kitchen. He also showed us some additional equipment like the bottle washer attachment that seems invaluable.
Once the work surface was clean, we placed the can of malt syrup in hot water to make it easier to work with. We also filled the 16 quart stainless pot with about 8 quarts of filtered water and set it on the stove to boil.
 Susan also showed us their brewers journal and shared with us how valuable it would be. It showed them what worked in the past and what didn't. I will, of course, keep notes for myself by largely record them here for future reference as well as for the good of my project. Bill also reminded us to read the directions. He admitted he wasn't always good at that since he has brewed before, but sometimes they actually have helpful information.
 Once the water was boiling we added the canned mixture which was a complete beer mixture including wheat malts and hops. Bill showed me how to make sure we get every drop of syrup out of the can. However, while doing this we discussed how to add ingredients if we wanted to. This beer wouldn't have any additional hops but if we were to Bill explained that would you put the hops into a permeable sack and drop it in only for a period of time depending on how much of a hops flavor you want. The best example of this is Dogfish Head Brewery's series featuring 60, 90 and 120 minute IPAs.
We then added the additional malts and stirred the mixture until there were no clumps.


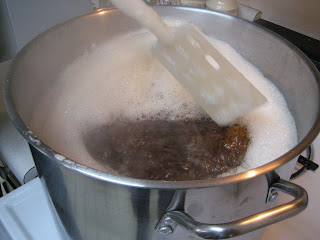 Once the mixture was boiled for several minutes make sure all the ingredients were well blended, it was time to pour it into the carboy. Beer needs to cool quickly from boiling to about 70-80 degrees. Bill had learned a trick on You Tube to put ice in the funnel and pour the beer mixture over it into the carboy. Worked like a charm.

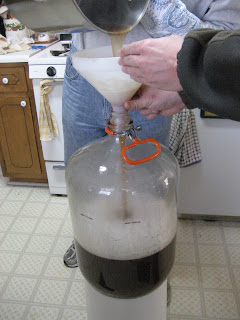 Once it was in the carboy we added water and the apricot. Bill and Susan had measured out how much you needed to fill the carboy to be able to make 2 cases worth of beer and drew the lines. They also determined that they needed to fill it just a little above the lines so that when you transferred it to the bottles you off set the level of sediment at the bottom of the carboy.
 We checked the temperature and it was at a perfect 79. Then we used a hydrometer to measure the specific gravity. Once we had those figured recorded in the trusty brewer's journal we added the yeast. Of course when brewing you need to use specific brewers yeast not bread or any other type of yeast because brewer's yeast can handle the alcohol. It does all the magic by eating the sugar and fermenting it.

 At that point, it was time to put the stopper on the top. It is a cap known as an airlock that lets the co2 escape. Bill and Susan fill it up with vodka which keeps away the tiny fruit flys who really love the co2.
 And now, the beer does it's magic. It will sit in the carboy and the yeast will eat all the sugars and belch out alcohol and after some time it can be bottled. Bill tells us that now is the lazy part of brewing. It'll be ready in a couple of weeks but you can leave it in for longer if you just aren't available to do the bottling. Susan has promised to take photographs of the fermenting process where the beer bubbles and churns without the help of human intervention. We plan on going back when it is ready to be bottled and help with that part as well. It still won't be ready to drink then, it'll need to age in a cold refrigerator for a few more weeks after that while the carbonation works it's own magic in the bottles. That will be a blog post for another time. For now, we wait.

After the beer brewing event, we went up to a local bar called the Brick Store. It is known for a great selection of Belgian Style and American Craft Brew Beers. Bill and Susan's nephew and niece-in-law joined us at the bar and we really enjoyed meeting them and had some great conversations.
Today, Matt and I are going to put together a list of things I need to start home brewing and then walk up to a local beer store to see what they have and buy what we can there and order the rest on line tonight.
Next week, we will be in Asheville for their Winter Warmer Beer Festival. I plan to write about our experience there as well. The weekend after that, though, I will start my first batch of home brewed beer. I can do this.
We arrived at their house about 11am and then headed out right away to a beer store in Lilburn GA. I had intended to get some supplies myself but because of this past week's winter weather event, they hadn't had any recent deliveries. In fact, they didn't have the precise ingredients for the beer that Bill wanted to brew. So I learned my first lesson in beer brewing - be flexible. He wanted to do a wheat beer he had done before and really focus on that for the next several batches he would make to perfect it. They didn't have the exact wheat beer so he chose another type that seemed like it would be a good fit. It required additional malt which he purchased as well. However, one key ingredient to Bill's "Wheaton Wheat" was an apricot extract so we discussed with the owners (a husband and wife team) about what some alternatives would be and she suggested we go down to an international market just down the street and get some apricot nectar. We were super excited about these ingredients and believe they will make an excellent apricot wheat. We returned to their house and began the process.
The first step we learned was to make sure the work space was clean and sterile. Bill recommended a product called B Bright. We cleaned all the equipment and all the surfaces in the kitchen. He also showed us some additional equipment like the bottle washer attachment that seems invaluable.
Once the work surface was clean, we placed the can of malt syrup in hot water to make it easier to work with. We also filled the 16 quart stainless pot with about 8 quarts of filtered water and set it on the stove to boil.


We then added the additional malts and stirred the mixture until there were no clumps.


After the beer brewing event, we went up to a local bar called the Brick Store. It is known for a great selection of Belgian Style and American Craft Brew Beers. Bill and Susan's nephew and niece-in-law joined us at the bar and we really enjoyed meeting them and had some great conversations.
Today, Matt and I are going to put together a list of things I need to start home brewing and then walk up to a local beer store to see what they have and buy what we can there and order the rest on line tonight.
Next week, we will be in Asheville for their Winter Warmer Beer Festival. I plan to write about our experience there as well. The weekend after that, though, I will start my first batch of home brewed beer. I can do this.
Saturday, January 8, 2011
What is in a beer glass?
Besides beer, of course.
Even before I began my odyssey of beer, I loved bar ware. I liked the variety of styles and the design of the labels. Once I began to enjoy beer, I learned that the type of beer glass you choose for the beer style you are drinking really does make a difference. At least that has been my own experience, but a quick search of the Internet gives you just as many opposing view points. I enjoy bar ware for a lot of reasons.
Over the last couple of years we have put together a lovely beer glass collection. Most of them are free because one of our local bars has Pint Night event weekly. There you can get a free glass for the beer of the month with purchase of said beer, while supplies last.
The first beer glass in our collection was actually for the British beer, Boddingtons. My husband began to drink Boddingtons and since it is sold in the pub cans, he wanted to drink it from the proper glass once it was poured. They are a tulip pint glass which is also used often for Guinness (which we also have).
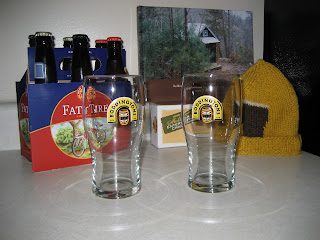 After that, he discovered the joy of Belgian style beer. Belgian beer bars are known for having a variety of beer glass styles. Not only do they have a glass for every style of beer, but typically there is a different glass for every single beer they offer. So we purchased a set of Chimay glasses. The goblet style is intended for heavy Belgian beers which are usually sipped more like wine.
 At this time, I still wasn't drinking traditional beers. However, I had been introduced to Lambics. While I can't drink them often any more because they are crazy sweet, they were a reasonable introduction to beer. I got a set of lambic glasses for Christmas one year. The style is intended to maximize the fruit aromas and flavors.
 However, it was a fateful trip to a Belgian beer bar that opened the world of beer up for me. I didn't know what to get, so I got a sampler with a lambic (because I knew I liked it) a local beer and the previously mentioned St. Bernardus Abt 12. From that moment on, I wanted to know more.
That is when I started to learn more about how beer glasses affect the way the beer is experienced. One of the most interesting glass styles we found were designed for Samuel Adams brewery.
 The Sam Adams website gives some information on why this glass was designed. The shape does several things. The smaller bottom keeps the beer at the right temperature for longer. The bell shaped middle collects the aroma of the beer. The narrow top maintains the head and enhances the hops while flared mouth lets the beer hit the front of your palate to really maximize the malt flavors. Is this just marketing? Maybe, but we got the glasses for free as part of a Pint Night promotion, so I'm okay with that. I do enjoy drinking beer from these glasses.
Wheat beers are also served in a different style of glass. We have Paulaner and Warsteiner glasses. They are narrow at the bottom with a wider mouth and are usually larger to make room for the fluffy, creamy head a good wheat beer should have.

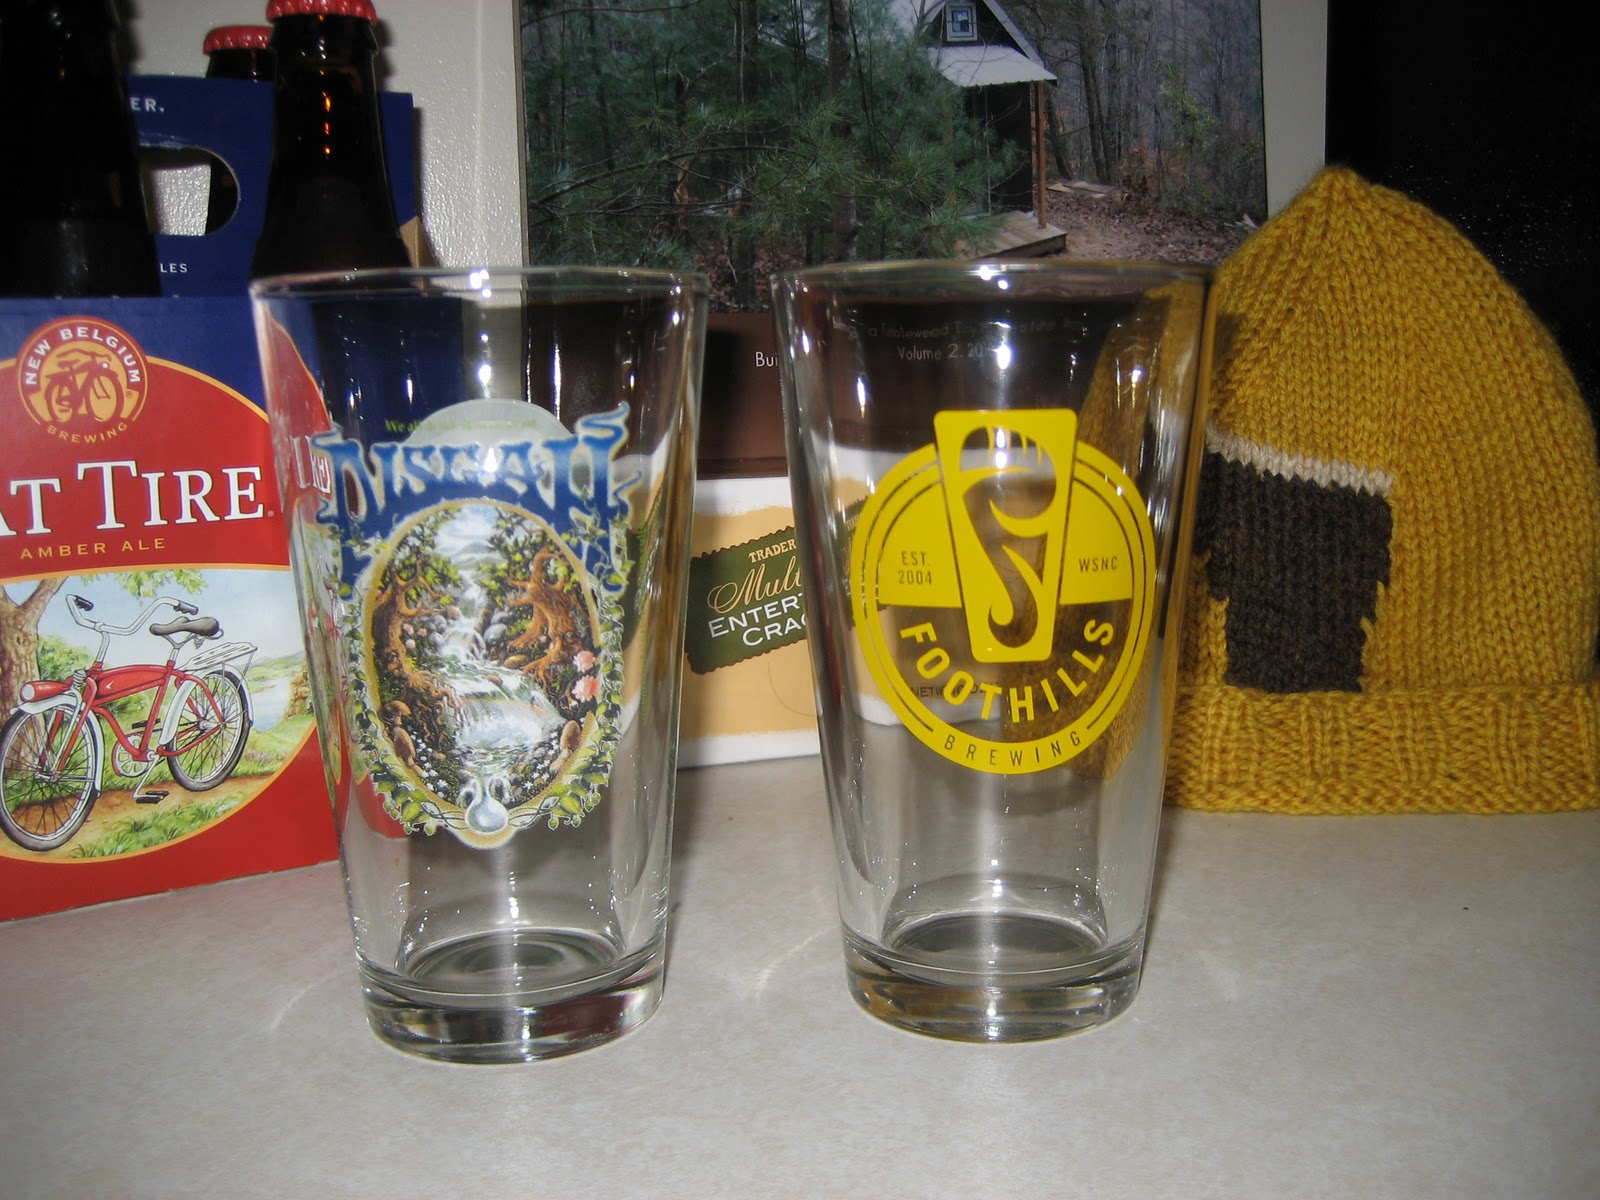
I also enjoy collecting beer glasses from local breweries that I enjoy. First, it is great to support the local beer industry where you live but also it is a cool keep sake if you eventually find yourself out of that area. We spend a lot of time in Asheville North Carolina so we are starting our NC Brewery glass collection.
 We live in Atlanta Georgia, though, so we have a few more local beer glasses from this area. I really like the Red Brick Brewery glass with the US map indicating "Us" and "You All". The ones you can't see as well are Terrapin Brewery out of Athens and Sweetwater which is here in the city.
 Part of the beer experience is exploring new beers at a beer festival, and we have kept the tasters that we have gotten from the premier beer festival here in Atlanta - the Great Decatur Beer Festival. We enjoy attending that with some friends every year. Collecting these glasses is sentimental.
 There are some other beer glasses that are purely sentimental. Each year we attend a local Canada Day Celebration with a friend of ours who is Canadian. Each year they give out beer glasses, which supplies last.
 And, of course, it is always just cool to drink a beer out of the its own glass.
 I hope you've enjoyed this exploration of beer glass styles as well as a the showcase of my collection. Stay tuned for exciting new beer adventures, beer tasting and beer making.
PS: Check out the awesome hand knit beer hat that I used in my photo vignette. It was made for me by a dear friend for the Decatur Beer Festival. I hope to share more about it. Perhaps I can encourage her to share it in a guest post.
Even before I began my odyssey of beer, I loved bar ware. I liked the variety of styles and the design of the labels. Once I began to enjoy beer, I learned that the type of beer glass you choose for the beer style you are drinking really does make a difference. At least that has been my own experience, but a quick search of the Internet gives you just as many opposing view points. I enjoy bar ware for a lot of reasons.
Over the last couple of years we have put together a lovely beer glass collection. Most of them are free because one of our local bars has Pint Night event weekly. There you can get a free glass for the beer of the month with purchase of said beer, while supplies last.
The first beer glass in our collection was actually for the British beer, Boddingtons. My husband began to drink Boddingtons and since it is sold in the pub cans, he wanted to drink it from the proper glass once it was poured. They are a tulip pint glass which is also used often for Guinness (which we also have).


That is when I started to learn more about how beer glasses affect the way the beer is experienced. One of the most interesting glass styles we found were designed for Samuel Adams brewery.

Wheat beers are also served in a different style of glass. We have Paulaner and Warsteiner glasses. They are narrow at the bottom with a wider mouth and are usually larger to make room for the fluffy, creamy head a good wheat beer should have.

I also enjoy collecting beer glasses from local breweries that I enjoy. First, it is great to support the local beer industry where you live but also it is a cool keep sake if you eventually find yourself out of that area. We spend a lot of time in Asheville North Carolina so we are starting our NC Brewery glass collection.


PS: Check out the awesome hand knit beer hat that I used in my photo vignette. It was made for me by a dear friend for the Decatur Beer Festival. I hope to share more about it. Perhaps I can encourage her to share it in a guest post.
Friday, January 7, 2011
Welcome to Beer and Now
It is 2011 and time to start a whole new adventure. Welcome to Beer and Now, by new blog about beer.
My enjoyment of beer started only a few years ago. I never use to like it. As recent as a decade ago I was known for referring to beer as "Yucky." However, I blame the city of Asheville North Carolina, the bar The Thirsty Monk and one taste of St. Bernardus Abt 12. Once I realized that beer was capable of that level of complexity I wanted to know more.
I now enjoy exploring new beer styles, going to beer festivals and understanding the art of brewing. This also means I am about to embark on a new hobby: Home Brewing! This blog will be a place to record all of these endeavors.
So please, join my on my adventures and maybe we'll all learn a little something about beer.
My enjoyment of beer started only a few years ago. I never use to like it. As recent as a decade ago I was known for referring to beer as "Yucky." However, I blame the city of Asheville North Carolina, the bar The Thirsty Monk and one taste of St. Bernardus Abt 12. Once I realized that beer was capable of that level of complexity I wanted to know more.
I now enjoy exploring new beer styles, going to beer festivals and understanding the art of brewing. This also means I am about to embark on a new hobby: Home Brewing! This blog will be a place to record all of these endeavors.
So please, join my on my adventures and maybe we'll all learn a little something about beer.
Subscribe to:
Posts (Atom)