I was reviewing my stats and learned that someone found this blog by Googling the words "How to make Zulu Beer." My sincerest apologies as you would have discovered that you will not learn to do that here. In fact, I should have titled the post "How NOT to make Zulu Beer."
Thanks for reading the Beer and Now Adventures!

Showing posts with label home brew. Show all posts
Showing posts with label home brew. Show all posts
Tuesday, April 10, 2012

Thursday, April 5, 2012
Seriously...it was *that* bad!
I recently tried a highly experimental home brew project. As I explained before, the idea came from
South Africa and a traditional Zulu beer that is made for celebrations. Because of our work with the Zulu Orphan Alliance in South Africa, I wanted to do something creative and different to
raise money for the organization to build a shelter and feed the kids. I
thought to myself that I should make a beer based on the traditional ingredients of Zulu beer - sorghum, pineapple, white bread and oats. At the same time, I wanted to make something that was part of the American Craft Beer culture and I thought the flavors would work well.

As you can see from my last post, I
figured I might as well go big or go home. That was 3 quarts each of sorghum and pineapple along with 7 pounds of honey wheat malt extract and a mini
mash that included oats. The mini mash and malt extract were the only
thing the beer actually needed for the recipe. It was
all my fault that I added so much more stuff.
The wort was sweet and fruity.
It fermented wildly for several days indicating that whatever the outcome, the
beer would be very strong. We waited patiently for the time when we could
bottle. Once it was bottled, we waited patiently again for it to
condition enough to drink.
The day before it was ready, we put
a couple of bottles in the refrigerator and gave it a night to chill.
The next evening the anticipation was overwhelming as we opened those two
bottles.
There was not the exciting
"Fffsssipt" noise when I opened the bottle. Uh oh, it didn't
carbonate. I had added the priming sugar, but perhaps the concentration
of sugar from the juice and syrup caused a very different chemical reaction.
Maybe there was no yeast left in the beer when we bottled it because off all
the juice and syrup. In any case, neither bottle Fffsssipted. But
boldly, I poured them in to tall Molson Canadian glasses to see what
happened. Matt and I toasted to experimental beers and each too a sip.
And gagged.
It was that bad. I took
another tentative sip to make sure I fully understood just how horrid it
was. It tasted like a juice box that had been left in a car for 7 years
then put back in the refrigerator. A fermented pineapple juice box.
Or a mix of pineapple juice and rubbing alcohol. There are many ways I
can describe the badness that was this beer. We stepped back, the abject
horror visible on both of our faces. This was not just the worst beer we
had ever tasted - it was the single most disgusting thing we had ever put in
our mouths. I quickly poured out the contents of the glasses and set the
sullied bar ware to the side. I got out two fresh glasses and poured us two
different, commercially available, and taste tested beers.
When I was a kid learning to ride a
bike, I was told that when I fell I just had to get up, brush myself off and
get back on that bike. I think every kid was told this. I don't feel
discouraged at all by the failed beer experiment. Though the task of
opening and dumping 5 gallons worth of beer from the bottles will be a little
tedious. I think I understand what I did wrong and can try again.
Next time, I won't be quite as aggressive. I think I need to start with a
solid wheat beer base that probably includes oats. Then I just add some
juice and some sorghum for flavoring. Just like my Pomegranate wheat, I
didn't add 5 gallons of pomegranate. Mostly because Pomegranate juice is
expensive and I didn't want to buy that much. But when the beer was done, I
could taste a bit of the fruit and it added to the beer, it didn't ruin
it. I just need to take my ow advice.
So, I'll be trying again one
day.
Monday, February 13, 2012
The Mad Zymurgist: Experimentations in Beer
In November I had the opportunity to travel to South Africa to start working on a project with an incredible group of people. The organization I work with is called the Zulu Orphan Alliance and they raise money to feed orphans and vulnerable children living in the townships outside Durban. One of the reasons that Matt and I went over was to start the process of building a shelter for the kids. The trip in November was more informational - we met the people we would be working with, saw the land where we will be building and got permission from the Zulu Councillor to build. We can't wait to go back, but the number one most important thing we need to do now is raise the money.
While we were there, I learned about Zulu beer. There is no one recipe for Zulu Beer, but it is often brewed with pineapple, oats, and bread and other versions are made with sorghum. I wasn't able to try any for myself while I was there, but my friend who lives in South Africa tried some traditional beer and got some photos for me.
I was inspired by this beer and wanted to try to make something similar back in the states. But what I really wanted to do was take the concept and integrate it into a more traditional American style beer.
 I bought the ingredients. To replace the bread, I chose a honey wheat extract. Also, I used a mini-mash of Belgian Pils Malt, white wheat and flaked oats. A mini-mash, if you've never brewed beer, is where you put all the grains in a cheesecloth bag and soak it in hot water to make a beer tea before adding the liquid malt extract and boiling the whole thing. When I added my honey wheat malt, I also added 3 quarts of sorghum syrup. I also added Hallertau Hops, a mild German hops that will add just a tiny bit of earthiness to what was going to be a very sweet beer.
Now, here is where things got a little crazy. When the wort was done boiling, I cooled it and put it in the carboy. Then, instead of adding water I added Pineapple Juice. This is incredibly insane. This made my original gravity very high, which is one of the measurements that help determine what your alcohol content will be in the finished product. I tasted the wort, which is tradition for home brewers and it was super sweet but potentially very good. It tasted like bread and pineapple. Then I added the yeast to the beer and the real magic will happen over the next few days. After a couple of weeks it will be ready to bottle and a few weeks after that it should be drinkable.
I have some plans for this beer. I am hoping that eventually I can use it to raise money for the Zulu Orphan Alliance. Since I am a home brewer, I can't sell my beer but what I can do is continue to perfect this recipe and then potentially contract brew to get it on the shelves and at the bars. The intention along the way would be for all the proceeds to go back to the ZOA to help feed the kids and build the shelter. Wish me luck.

 |
| Zulu Beer in the making for a wedding celebration. |
I was inspired by this beer and wanted to try to make something similar back in the states. But what I really wanted to do was take the concept and integrate it into a more traditional American style beer.
Now, here is where things got a little crazy. When the wort was done boiling, I cooled it and put it in the carboy. Then, instead of adding water I added Pineapple Juice. This is incredibly insane. This made my original gravity very high, which is one of the measurements that help determine what your alcohol content will be in the finished product. I tasted the wort, which is tradition for home brewers and it was super sweet but potentially very good. It tasted like bread and pineapple. Then I added the yeast to the beer and the real magic will happen over the next few days. After a couple of weeks it will be ready to bottle and a few weeks after that it should be drinkable.
I have some plans for this beer. I am hoping that eventually I can use it to raise money for the Zulu Orphan Alliance. Since I am a home brewer, I can't sell my beer but what I can do is continue to perfect this recipe and then potentially contract brew to get it on the shelves and at the bars. The intention along the way would be for all the proceeds to go back to the ZOA to help feed the kids and build the shelter. Wish me luck.

Tuesday, December 27, 2011
Happy Holidays from Beer and Now!

Happy Holidays from Beer and Now!
This year, for the holidays, I gave a tasty Yule Gingerbread Porter to our friends and family* as gifts. It was a standard brown porter recipe to which I added gingerbread spices (ginger, allspice, clove and cinnamon). I enjoyed making and drinking this beer.
*Not all of our friends have received it yet, but I figure at this point it is all good. If they read this blog, they'll just know what they're getting anyway.
Tuesday, June 14, 2011
Damn, I make good beer!
Okay, I don't want to jinx myself and I am sure the first bad batch of beer is coming eventually, but my most recent batch is awesome. The Austin Home Brew modified brown recipe is delicious. A little bit nutty, a little bit chocolaty. It has a beautiful thick and creamy head that leaves a beautiful lacing on the glass. I couldn't be more pleased.


Here is the party pig - along with whatever it was we were making for dinner.

Yum.
A couple of weeks ago, we stopped by a local home brew store - Brewmaster's Warehouse. I was planning to design my own beer but I wasn't feeling too confident when we got there. I decided to just have them help me pick out a recipe. We went with an American wheat. I do plan to modify this one as well, but my plan is to add pomegranate as a part of a secondary fermentation. There are a few companies that do a pomegranate wheat, so I imagine that it can either be amazing or really horrible. I'll keep you updated.
Sunday, April 17, 2011
Girls a-Brewin'!
Matt has been out of town. Actually, out of the country. He is in Toronto with his brother this weekend. But I wanted to brew the next batch of beer, so I set out to do just that. I invited our friends Andy and Emily over for some assistance and company. The process went smoothly and the beer is fermenting away as we speak so I would consider it a success so far.

Since Emily was helping me out with the brewing this week I got to pondering the role of women in home brewing. I'm familiar with the history of brewing and that it had long been a woman's role in the household, but then the 20th century came and it became the domain of the college-age man. There is a female presence in the professional brewing industry, but still don't hear a lot about women home brewers. When googling the subject, you find some articles as old as 1994 and messages in forums wondering if there are any women out there, but receiving only a few responses. It seems that beer hadn't been an interest for women until the craft beer boom in recent years, so it seems to me that brewing would be a hobby more women would want to get involved in.

So, this weekend, with Emily helping me with my third batch of beer ever (and second brown) I wanted to celebrate Girl Power in brewing. I really enjoy this process and I am getting more comfortable with my skills. I'm ready to move on to designing my own recipes. Maybe I can lead the way to a girls home brewing movement. Who's with me?

Since Emily was helping me out with the brewing this week I got to pondering the role of women in home brewing. I'm familiar with the history of brewing and that it had long been a woman's role in the household, but then the 20th century came and it became the domain of the college-age man. There is a female presence in the professional brewing industry, but still don't hear a lot about women home brewers. When googling the subject, you find some articles as old as 1994 and messages in forums wondering if there are any women out there, but receiving only a few responses. It seems that beer hadn't been an interest for women until the craft beer boom in recent years, so it seems to me that brewing would be a hobby more women would want to get involved in.

So, this weekend, with Emily helping me with my third batch of beer ever (and second brown) I wanted to celebrate Girl Power in brewing. I really enjoy this process and I am getting more comfortable with my skills. I'm ready to move on to designing my own recipes. Maybe I can lead the way to a girls home brewing movement. Who's with me?
Wednesday, April 6, 2011
Beerthday Weekend
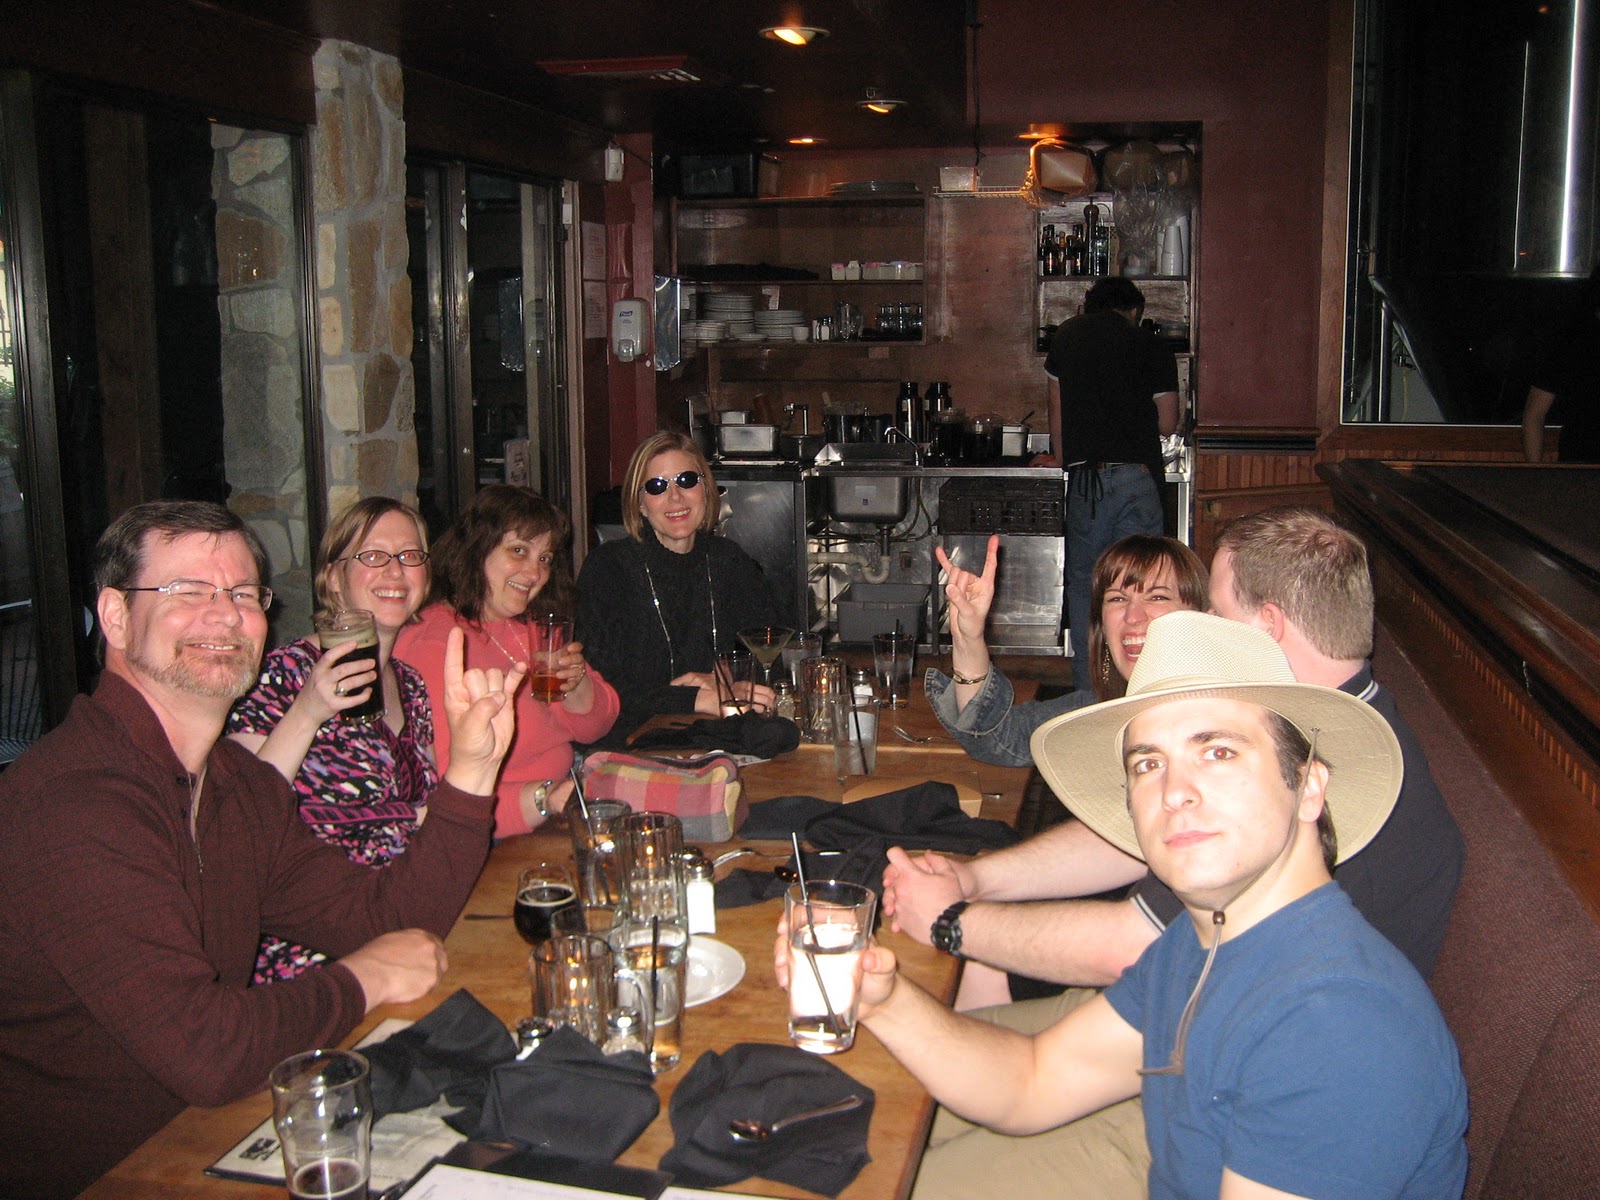


I have also been pleased with the clarity of our beers so far without going through a secondary fermentation process (also known as a clarification). It might just be beginners luck or the fact that we like to use a filter when pouring the beer in the carboy and again when we put it in the bottling bucket.
I have another brown recipe ready to go. This time, I bought a "kit" from Austin Homebrew but added some additional malts to modify it a little. I expect to be brewing that in a few weeks and we'll see how it goes. Expect more updates from Beer and Now soon.
Sunday, March 6, 2011
Beer Brew II: ESB
After the most successful outcome of my first brewing attempt, I wanted to dive right into the second batch of beer. This time I wanted to brew another favorite style - an ESB or Extra Special Bitter (or Extra Strong Bitter depending on who you ask).
I started by purchasing a recipe from a great website called Austin Homebrew Supply. Like the pre-made kit I bought at the local homebrew store, this included all that I would need to brew this beer. The difference was in the presentation. Austin Homebrew puts together recipes and when you select them the website gives you options with different ways to put that particular recipe together. It was a great option for my second brew. (And my third since I already bought the ingredients but I'm getting ahead of myself).
 Like my first brewing day, we decided it would be fun to invite a friend. Andrew, who has brewed himself, came and spent the day with us. We each enjoyed a Bare Kitty Brown as well as the brand new Wheaton Wheat that my Beer Yoda Bill brewed on the day we went to learn the art of home brewing. As a side note, his beer was excellent as well. I began my second brewing with the typical process of cleaning and sanitizing and then I just followed the recipe. This kit included a bag of grains for steeping, which the other kit did not include. It was as easy as making tea. Once that was done per instruction, it was time to add the malt extracts and bring everything to a boil. It boiled for 60 minutes with a bittering Nugget hops added at the beginning and then an aroma Kent Golding hops added in the last 5 minutes of the boil. After this process was complete it was time to pour it into the carboy, take the original gravity reading and add the yeast. I don't think I still have quite the hang of the gravity readings down. I recently broke my first hydrometer so Matt went and bought me a new one that included a tube with stand.


I started by purchasing a recipe from a great website called Austin Homebrew Supply. Like the pre-made kit I bought at the local homebrew store, this included all that I would need to brew this beer. The difference was in the presentation. Austin Homebrew puts together recipes and when you select them the website gives you options with different ways to put that particular recipe together. It was a great option for my second brew. (And my third since I already bought the ingredients but I'm getting ahead of myself).


Here is the beer boiling process.

Here are Andrew and Matt helping pour the wort into the carboy.
 Even Piglet joined in on the fun.
 Here is Matt considering the Hydrometer reading. It was 1.041 this time, which was lower than the recipe called for. We figure that has to do with the amount of water we may have added. I'm not terribly worried about it. We still have no idea what the alcohol content is of the Brown and it hasn't affected the taste at all. I suppose this is a skill I will need to perfect over time, but for now I'll just keep brewing.
 And the tasting of the wort, with the kitty timer looking on with judgment. It tasted like bread, which is precisely what it should taste like.


Now the airlock on the carboy is bloop blooping away happily. The house smells pleasantly like hops and in about two to four weeks we can bottle this batch and see what we have.
Matt asked me yesterday if there was anything I found specifically difficult in the brewing process. I don't, actually. I have always been good at following recipe directions. The cleaning process isn't too bad either, even though it isn't my favorite part.
I have another kit from Austin Homebrew Supply in my pantry ready to be brewed. It is another brown - a recipe from their selections with a slight modification (extra dark malt to add to the recipe). It will be my second brown and I am interested in understanding the differences. Once I get that one under my belt I want to get a couple books to help me design my own recipes. I just want to understand the basics that go into beer styles and from there I can make my own modifications. I am excited about that.
Friday, February 25, 2011
Introducing: Sphynx Cat Home Brew
I was pleased to discover that what I had was "Wow, that is really good!" Now, of course, this is a beer brewed from a kit, but considering it was my first attempt I feel really good about it.
Sure, it seems cheezy to name your home brew, but I am doing it anyway. My beer is named after my Sphynx Cat, Piglet. This first beer is the BareKitty Brown. And it is yummy.
I am excited to brew my second batch now.


Sunday, February 13, 2011
Bottles of Beer!
Another step in the beer brewing process has been achieved today. After returning yesterday from our vacation we spent today bottling our first batch of home brewed beer.
 We cleaned the kitchen, got everything set up and sanitized our tools. We popped the carboy up on the counter and siphoned it into the bottling bucket on the floor. During this process we also took a sample for the hydrometer and we added the priming sugar solution. We realized at this point that we had recorded our initial gravity reading incorrectly and because of that we were unable to calculate our alcohol content. So, the recipe suggested that it would be about a 4.5% alcohol beer so we're going with that. It was also a good time to taste the beer. The color was a perfect brown color and it tasted like not-half-bad flat beer, which I suppose is exactly what it is supposed to taste like at this point. I can't wait for it to condition in the bottles so we can taste it with the right carbonation.
At this point, it was time to bottle the beer. We used typical amber colored 12 ounce bottles which we had washed, sanitized and rinsed. We used the sweet bottle rinsing attachment on the kitchen sink. It is a little brass doohickey that goes on the faucet and points up with a lever that when you push the bottle down, pressurized water swooshes into the bottle. What fun!
We put the bottling bucket up on the counter and tried at first to use the spigot to bottle the beer. I found this method messy. So we attached the siphon hose to the spigot along with a nifty spring loaded attachment. You stick that into the bottle and press down until it fills up to the mouth of the bottle and when you remove the device the bottle is filled to a perfect level. It worked very well. Then we set the bottles in the dishwasher just to dry, which you can see behind me.

Of course, after bottling comes bottle capping. We have the simple hand held bottle capping tool and it was so easy to use that even I could do it. It didn't require any sort of brute force, just the right downward pressure and it was a snap.

As I said, now it is a waiting game. The bottles need to sit and condition in a cool, dry place. This will ensure that it they are carbonated properly. I believe that we will end up with a thoroughly drinkable beer.
In other beer news, I also received a package today containing the ingredients for my next two batches of beer. I found a great website called Austin Homebrew Supply where they sell "kits" for beer making but not the traditional beer kit in a box like the one we just did. Essentially, they have developed several recipes and sell you the combinations of ingredients to brew that particular beer. It opens the door for some experimentation as well. We ordered the recipe and ingredients for another brown as well as for an ESB. We are in Atlanta this coming weekend so we think we might brew up our second batch of beer while we're home.

At this point, it was time to bottle the beer. We used typical amber colored 12 ounce bottles which we had washed, sanitized and rinsed. We used the sweet bottle rinsing attachment on the kitchen sink. It is a little brass doohickey that goes on the faucet and points up with a lever that when you push the bottle down, pressurized water swooshes into the bottle. What fun!
We put the bottling bucket up on the counter and tried at first to use the spigot to bottle the beer. I found this method messy. So we attached the siphon hose to the spigot along with a nifty spring loaded attachment. You stick that into the bottle and press down until it fills up to the mouth of the bottle and when you remove the device the bottle is filled to a perfect level. It worked very well. Then we set the bottles in the dishwasher just to dry, which you can see behind me.

Of course, after bottling comes bottle capping. We have the simple hand held bottle capping tool and it was so easy to use that even I could do it. It didn't require any sort of brute force, just the right downward pressure and it was a snap.

As I said, now it is a waiting game. The bottles need to sit and condition in a cool, dry place. This will ensure that it they are carbonated properly. I believe that we will end up with a thoroughly drinkable beer.
In other beer news, I also received a package today containing the ingredients for my next two batches of beer. I found a great website called Austin Homebrew Supply where they sell "kits" for beer making but not the traditional beer kit in a box like the one we just did. Essentially, they have developed several recipes and sell you the combinations of ingredients to brew that particular beer. It opens the door for some experimentation as well. We ordered the recipe and ingredients for another brown as well as for an ESB. We are in Atlanta this coming weekend so we think we might brew up our second batch of beer while we're home.
Sunday, January 30, 2011
There will be beer!
Yesterday, I brewed my very first batch of beer. It remains to be seen if this batch is indeed successful - we'll know after a few weeks when we bottle it and chill it.
I woke up kind of early on Saturday because my brain started working and I was getting excited about trying my first home brew. I started the day by cleaning everything as per instructions. Matt and I are by no means dirty people, but the kitchen was the cleanest I think it has ever been once I finished with it. A little at 1pm our friend Emily came over to hang out while making the beer. We all decided that it was imperative to enjoy beer while making beer so Matt was drinking Sierra Nevada Pale ale, I had a Left Hand Milk Stout and Emily was drinking Framboise Lambic.
 The brewing process was pretty much a one girl show. I felt pretty good following the directions. I decided to start with a kit because it was my first time brewing. I wanted to be able to follow the directions step by step so I understood the process and could take that to experimentation with recipes in the future. Before Emily arrived I spent some time actually writing out my own step by step directions using notes from my first beer making tutorial with Beer Yoda Bill several weeks ago, the book The Joy of Homebrewing and the directions included with my kit. I started by making a brown ale, because it is my favorite style of beer.
Step 1, Clean and Sanitize
I did all of this, as I said, before Emily arrived. The kitchen was sparkling, the equipment was ready to go.
Step 2, Prepare Malt Can
This was something beer Yoda Bill showed me how to do and I didn't realize it was standard practice. I removed the label from the can and soaked it in a hot water bath so it would soften and become more liquid-y.
Step 3, Boil Water
The directions for the kit said 1 to 1.5 gallons of water. This seemed low, but I wanted to follow the directions. However, I decided specifically to start with the lower end because I knew this would not be a high alcohol beer and I thought (maybe erroneously) that the more concentrated the ingredients were perhaps it would be a little stronger. I don't suppose that really does matter because you add a lot of water in the end anyway. But, there I was with 1 gallon of boiling water.
Step 4, Add Extract, Malt and Hops
The package directions suggested I take the water off the heat at this point to mix in the ingredients. I did turn the burner off but after getting the extract out of the can, I decided to turn the heat back up because that was how we made the beer at Beer Yoda Bill's. I slowly added the malt powder mixing it with the paddle to make sure there were no lumps. Then I added the hops, which the beer store people assured me wouldn't make the beer too hoppy, it was just there for a little bitterness and aroma. I trusted them.
 Step 5, Bring back to Boil
Step 6, Boil for 30 minutes
 Once it came back to a boil, I set the kitchen timer for 30 minutes. I noticed in the package directions they were pretty noncommittal in regards to how long to boil it. I decided to boil it at the long end of the suggested times. This was done for purely unscientific reason.
Step 7, Pour Cool Water in Carboy
I don't remember doing this at Beer Yoda Bills, but it made sense to me. By having cool water in the carboy it would help bring the beer temp down significantly once it was in the carboy. The package directions suggested "3 to 4 Gallons" so we went with 3.
Step 8, Pour Mixture Over Ice Into Carboy
 The ice trick was something we had learned from Bill. It was an easy way to bring down the temp of the mixture quickly. We used a giant no-splatter funnel that we bought when we got our equipment. I really liked it. We put in the funnel filter but also used, at the recommendation of the beer store people, an additional nylon bag screen that we fit over the funnel. This was to keep a lot of the sludge out of the carboy. Worked like a charm. We filled it up with ice and then slowly poured the beer mixture through and let it filter and melt down and then repeated this step until all the mixture was in the carboy. My assistants were very helpful in this endeavor. This photo is a dramatic recreation.
Step 9, Add More Cold Water
The final number of total gallons in the carboy was to be about 5. We calculated how may gallons we already had and added a couple more to get it up to what should be 5. It looked to be at about the same level I remember Beer Yoda Bill's wort being in the carboy so I felt good about it.
Step 10, Temperature
The wort at this time needs to be between 70 and 80 degrees to be able to pitch the yeast. We dropped in the thermometer and it was perfect - about 75.
Step 11, Take Gravity Reading
Our specific gravity at this time was 1.38. This was great since it said the starting gravity would be about 1.45. The lower the gravity the higher the probably alcohol content so I am guessing it'll be slightly higher in the end than the 4.5% that the package indicates. This is good, actually. Not that I am trying to make an 11.5% alcohol beer, but I didn't want to make O'Doul's
Step 11a, Taste the Wort
 I failed to put this on the list, to Emily wrote it in. When we tasted the wort at Beer Yoda Bill's house it tasted like bread. This is normal. His beer was a wheat, while ours is barley based but it still should taste like bread. We put a little into some cordial glasses my sister got us for Christmas. (She liked them because they looked like little beer pilsners and because they were tiny she bought them for our tiny house) They were perfect. The wort tasted like water and bread and I think that was about right. Bill's tasted less like water but he had used a LOT more malt to get a higher gravity beer so the difference even made sense to us.
Step 12, Pitch the Yeast
There was some conflicting information about how exactly to pitch the yeast. Some suggest mixing or shaking the carboy to make sure it is all incorporated into the wort. Some suggest just pouring it in and letting it drop on its own. I hadn't yet made the decision but the decision was made for me soon in the process.
Step 13 Add Airlock
Throughout this whole process I thought to myself "Wow, this has been really easy". There was no issue, no complications. I followed the steps and I felt really good about it. Then I had the "Oh Shit" moment. Matt, while attempting to be helpful, stuffed the airlock stopper too far into the carboy neck. In an attempt to get it out, we simply managed to push it into the wort. That the was moment where I thought to myself, "I can't do this? What am I doing? I suck." It is a feeling I've had several times in my life, but I think it is those challenges that make the ultimate experience worth while. After I few choice words, Matt made an emergency run to the beer supply store.
Step 13a: Buy New Airlock Stopper
When he went in the owner was there and he said to her, "We have an emergency! We have just put our beer into the carboy with the yeast and we don't have a stopper!" She told him to just take it and he came back within just a few minutes. A quick google search later I discovered that this is not an uncommon problem. We will deal with getting the sanitized stopper out after the beer is done fermenting.
Step 14 Take over the World
After our beer brewing adventure we decided instead of taking over the world we would simply walk up to a local restaurant for dinner, which was yummy. We'll take over the world some other time.
 Over night, the yeast started working it's yeasty magic and the airlock is happily blurp-blurping away. The next part of the process is to simply wait. The fermenting beer smells like hops, which I also googled to find is completely normal. In fact, it seems that fermenting beer can smell like all sorts of things so hops is one of the more normal smells. It should mellow after a short time.
Now, we wait. Watch for updates on my first brown beer once we get to the bottling stage.

I woke up kind of early on Saturday because my brain started working and I was getting excited about trying my first home brew. I started the day by cleaning everything as per instructions. Matt and I are by no means dirty people, but the kitchen was the cleanest I think it has ever been once I finished with it. A little at 1pm our friend Emily came over to hang out while making the beer. We all decided that it was imperative to enjoy beer while making beer so Matt was drinking Sierra Nevada Pale ale, I had a Left Hand Milk Stout and Emily was drinking Framboise Lambic.

Step 1, Clean and Sanitize
I did all of this, as I said, before Emily arrived. The kitchen was sparkling, the equipment was ready to go.
Step 2, Prepare Malt Can
This was something beer Yoda Bill showed me how to do and I didn't realize it was standard practice. I removed the label from the can and soaked it in a hot water bath so it would soften and become more liquid-y.
Step 3, Boil Water
The directions for the kit said 1 to 1.5 gallons of water. This seemed low, but I wanted to follow the directions. However, I decided specifically to start with the lower end because I knew this would not be a high alcohol beer and I thought (maybe erroneously) that the more concentrated the ingredients were perhaps it would be a little stronger. I don't suppose that really does matter because you add a lot of water in the end anyway. But, there I was with 1 gallon of boiling water.
Step 4, Add Extract, Malt and Hops
The package directions suggested I take the water off the heat at this point to mix in the ingredients. I did turn the burner off but after getting the extract out of the can, I decided to turn the heat back up because that was how we made the beer at Beer Yoda Bill's. I slowly added the malt powder mixing it with the paddle to make sure there were no lumps. Then I added the hops, which the beer store people assured me wouldn't make the beer too hoppy, it was just there for a little bitterness and aroma. I trusted them.

Step 6, Boil for 30 minutes

Step 7, Pour Cool Water in Carboy
I don't remember doing this at Beer Yoda Bills, but it made sense to me. By having cool water in the carboy it would help bring the beer temp down significantly once it was in the carboy. The package directions suggested "3 to 4 Gallons" so we went with 3.
Step 8, Pour Mixture Over Ice Into Carboy

Step 9, Add More Cold Water
The final number of total gallons in the carboy was to be about 5. We calculated how may gallons we already had and added a couple more to get it up to what should be 5. It looked to be at about the same level I remember Beer Yoda Bill's wort being in the carboy so I felt good about it.
Step 10, Temperature
The wort at this time needs to be between 70 and 80 degrees to be able to pitch the yeast. We dropped in the thermometer and it was perfect - about 75.
Step 11, Take Gravity Reading
Our specific gravity at this time was 1.38. This was great since it said the starting gravity would be about 1.45. The lower the gravity the higher the probably alcohol content so I am guessing it'll be slightly higher in the end than the 4.5% that the package indicates. This is good, actually. Not that I am trying to make an 11.5% alcohol beer, but I didn't want to make O'Doul's
Step 11a, Taste the Wort

Step 12, Pitch the Yeast
There was some conflicting information about how exactly to pitch the yeast. Some suggest mixing or shaking the carboy to make sure it is all incorporated into the wort. Some suggest just pouring it in and letting it drop on its own. I hadn't yet made the decision but the decision was made for me soon in the process.
Step 13 Add Airlock
Throughout this whole process I thought to myself "Wow, this has been really easy". There was no issue, no complications. I followed the steps and I felt really good about it. Then I had the "Oh Shit" moment. Matt, while attempting to be helpful, stuffed the airlock stopper too far into the carboy neck. In an attempt to get it out, we simply managed to push it into the wort. That the was moment where I thought to myself, "I can't do this? What am I doing? I suck." It is a feeling I've had several times in my life, but I think it is those challenges that make the ultimate experience worth while. After I few choice words, Matt made an emergency run to the beer supply store.
Step 13a: Buy New Airlock Stopper
When he went in the owner was there and he said to her, "We have an emergency! We have just put our beer into the carboy with the yeast and we don't have a stopper!" She told him to just take it and he came back within just a few minutes. A quick google search later I discovered that this is not an uncommon problem. We will deal with getting the sanitized stopper out after the beer is done fermenting.
Step 14 Take over the World
After our beer brewing adventure we decided instead of taking over the world we would simply walk up to a local restaurant for dinner, which was yummy. We'll take over the world some other time.

Now, we wait. Watch for updates on my first brown beer once we get to the bottling stage.

Monday, January 17, 2011
Primordial Beer
Our Beer Yoda Bill took this video of the Wheaton Wheat fermenting. I love the accidental cinematography at the beginning. The slow reveal of the airlock is almost Hitchcock-esque.
I can't wait to see what the resulting beer will taste like.
I can't wait to see what the resulting beer will taste like.
Sunday, January 16, 2011
Do or Do Not, There is no Try
Yesterday, Matt and I spent the day with our very own beer Yoda, our friend Bill. Bill has been brewing beer for many years with varied levels of success. So we joined him and his wife Susan for a day of beer making.
We arrived at their house about 11am and then headed out right away to a beer store in Lilburn GA. I had intended to get some supplies myself but because of this past week's winter weather event, they hadn't had any recent deliveries. In fact, they didn't have the precise ingredients for the beer that Bill wanted to brew. So I learned my first lesson in beer brewing - be flexible. He wanted to do a wheat beer he had done before and really focus on that for the next several batches he would make to perfect it. They didn't have the exact wheat beer so he chose another type that seemed like it would be a good fit. It required additional malt which he purchased as well. However, one key ingredient to Bill's "Wheaton Wheat" was an apricot extract so we discussed with the owners (a husband and wife team) about what some alternatives would be and she suggested we go down to an international market just down the street and get some apricot nectar. We were super excited about these ingredients and believe they will make an excellent apricot wheat. We returned to their house and began the process.
The first step we learned was to make sure the work space was clean and sterile. Bill recommended a product called B Bright. We cleaned all the equipment and all the surfaces in the kitchen. He also showed us some additional equipment like the bottle washer attachment that seems invaluable.
Once the work surface was clean, we placed the can of malt syrup in hot water to make it easier to work with. We also filled the 16 quart stainless pot with about 8 quarts of filtered water and set it on the stove to boil.
 Susan also showed us their brewers journal and shared with us how valuable it would be. It showed them what worked in the past and what didn't. I will, of course, keep notes for myself by largely record them here for future reference as well as for the good of my project. Bill also reminded us to read the directions. He admitted he wasn't always good at that since he has brewed before, but sometimes they actually have helpful information.
 Once the water was boiling we added the canned mixture which was a complete beer mixture including wheat malts and hops. Bill showed me how to make sure we get every drop of syrup out of the can. However, while doing this we discussed how to add ingredients if we wanted to. This beer wouldn't have any additional hops but if we were to Bill explained that would you put the hops into a permeable sack and drop it in only for a period of time depending on how much of a hops flavor you want. The best example of this is Dogfish Head Brewery's series featuring 60, 90 and 120 minute IPAs.
We then added the additional malts and stirred the mixture until there were no clumps.


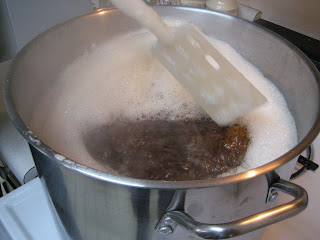 Once the mixture was boiled for several minutes make sure all the ingredients were well blended, it was time to pour it into the carboy. Beer needs to cool quickly from boiling to about 70-80 degrees. Bill had learned a trick on You Tube to put ice in the funnel and pour the beer mixture over it into the carboy. Worked like a charm.

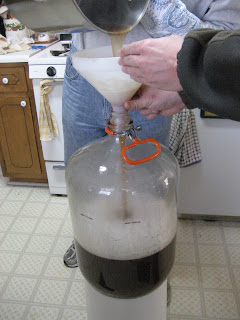 Once it was in the carboy we added water and the apricot. Bill and Susan had measured out how much you needed to fill the carboy to be able to make 2 cases worth of beer and drew the lines. They also determined that they needed to fill it just a little above the lines so that when you transferred it to the bottles you off set the level of sediment at the bottom of the carboy.
 We checked the temperature and it was at a perfect 79. Then we used a hydrometer to measure the specific gravity. Once we had those figured recorded in the trusty brewer's journal we added the yeast. Of course when brewing you need to use specific brewers yeast not bread or any other type of yeast because brewer's yeast can handle the alcohol. It does all the magic by eating the sugar and fermenting it.

 At that point, it was time to put the stopper on the top. It is a cap known as an airlock that lets the co2 escape. Bill and Susan fill it up with vodka which keeps away the tiny fruit flys who really love the co2.
 And now, the beer does it's magic. It will sit in the carboy and the yeast will eat all the sugars and belch out alcohol and after some time it can be bottled. Bill tells us that now is the lazy part of brewing. It'll be ready in a couple of weeks but you can leave it in for longer if you just aren't available to do the bottling. Susan has promised to take photographs of the fermenting process where the beer bubbles and churns without the help of human intervention. We plan on going back when it is ready to be bottled and help with that part as well. It still won't be ready to drink then, it'll need to age in a cold refrigerator for a few more weeks after that while the carbonation works it's own magic in the bottles. That will be a blog post for another time. For now, we wait.

After the beer brewing event, we went up to a local bar called the Brick Store. It is known for a great selection of Belgian Style and American Craft Brew Beers. Bill and Susan's nephew and niece-in-law joined us at the bar and we really enjoyed meeting them and had some great conversations.
Today, Matt and I are going to put together a list of things I need to start home brewing and then walk up to a local beer store to see what they have and buy what we can there and order the rest on line tonight.
Next week, we will be in Asheville for their Winter Warmer Beer Festival. I plan to write about our experience there as well. The weekend after that, though, I will start my first batch of home brewed beer. I can do this.
We arrived at their house about 11am and then headed out right away to a beer store in Lilburn GA. I had intended to get some supplies myself but because of this past week's winter weather event, they hadn't had any recent deliveries. In fact, they didn't have the precise ingredients for the beer that Bill wanted to brew. So I learned my first lesson in beer brewing - be flexible. He wanted to do a wheat beer he had done before and really focus on that for the next several batches he would make to perfect it. They didn't have the exact wheat beer so he chose another type that seemed like it would be a good fit. It required additional malt which he purchased as well. However, one key ingredient to Bill's "Wheaton Wheat" was an apricot extract so we discussed with the owners (a husband and wife team) about what some alternatives would be and she suggested we go down to an international market just down the street and get some apricot nectar. We were super excited about these ingredients and believe they will make an excellent apricot wheat. We returned to their house and began the process.
The first step we learned was to make sure the work space was clean and sterile. Bill recommended a product called B Bright. We cleaned all the equipment and all the surfaces in the kitchen. He also showed us some additional equipment like the bottle washer attachment that seems invaluable.
Once the work surface was clean, we placed the can of malt syrup in hot water to make it easier to work with. We also filled the 16 quart stainless pot with about 8 quarts of filtered water and set it on the stove to boil.


We then added the additional malts and stirred the mixture until there were no clumps.


After the beer brewing event, we went up to a local bar called the Brick Store. It is known for a great selection of Belgian Style and American Craft Brew Beers. Bill and Susan's nephew and niece-in-law joined us at the bar and we really enjoyed meeting them and had some great conversations.
Today, Matt and I are going to put together a list of things I need to start home brewing and then walk up to a local beer store to see what they have and buy what we can there and order the rest on line tonight.
Next week, we will be in Asheville for their Winter Warmer Beer Festival. I plan to write about our experience there as well. The weekend after that, though, I will start my first batch of home brewed beer. I can do this.
Subscribe to:
Posts (Atom)